A help article is a piece of online instruction or explanation that’s designed to assist users with a product, service, or website. It’s like a mini self-service guide written in clear, easy-to-understand language.
Click on "New article"
When you are inside Dashboard > Articles, click on Add to create your first article.
Provide a title and content
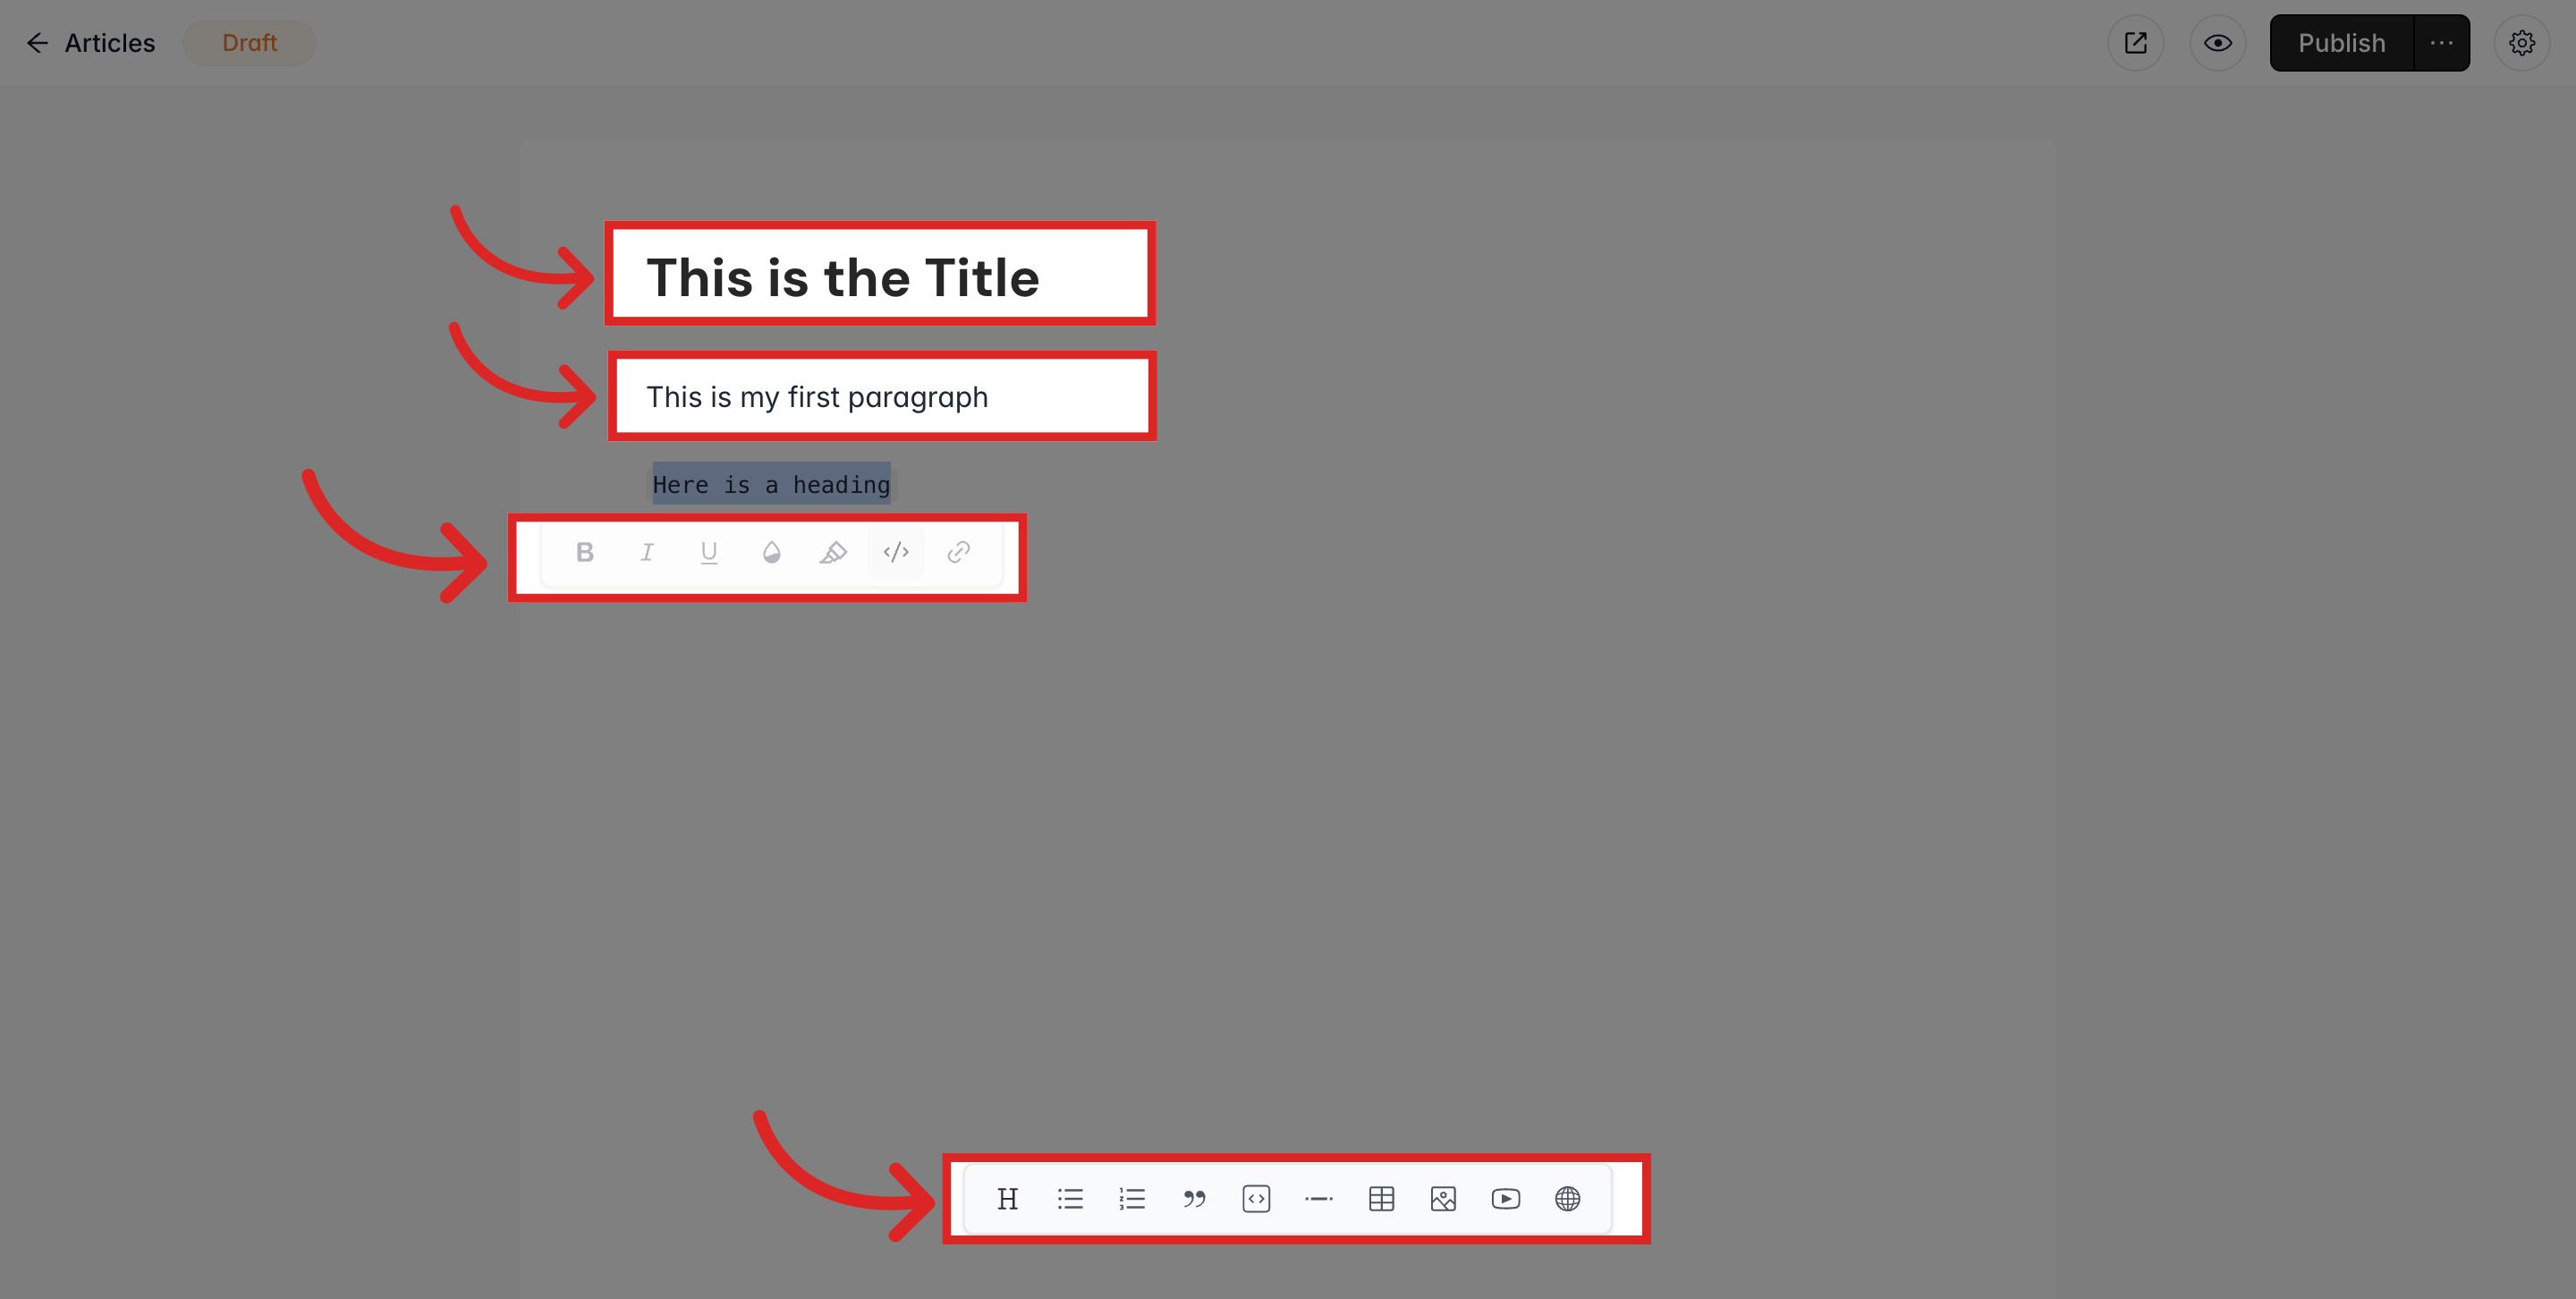
Provide a title and content for your article. When you highlight a piece of text in your editor, you will find different editing options.
Such as; Bold, Italic, Underline, Font Color, Highlight, Code Line and Hyperlink. At the bottom of the page there is another tool bar which gives you additional editing options.

Heading 1 | for main headings |
Heading 2 | for subheading such as step or a subtopic |
Bullet Points | to highlight key points or outline information |
List | to create organized lists |
Quote | to quote a specific part |
Code Block | to insert a code block |
Divider | to add horizontal line for separation |
Insert Table | to insert a table |
Add Image | to insert an image |
Add YouTube Video | to embed a YouTube video |
Embed URL | to embed links to Loom, Vimeo, and so on |
Click on "Publish"
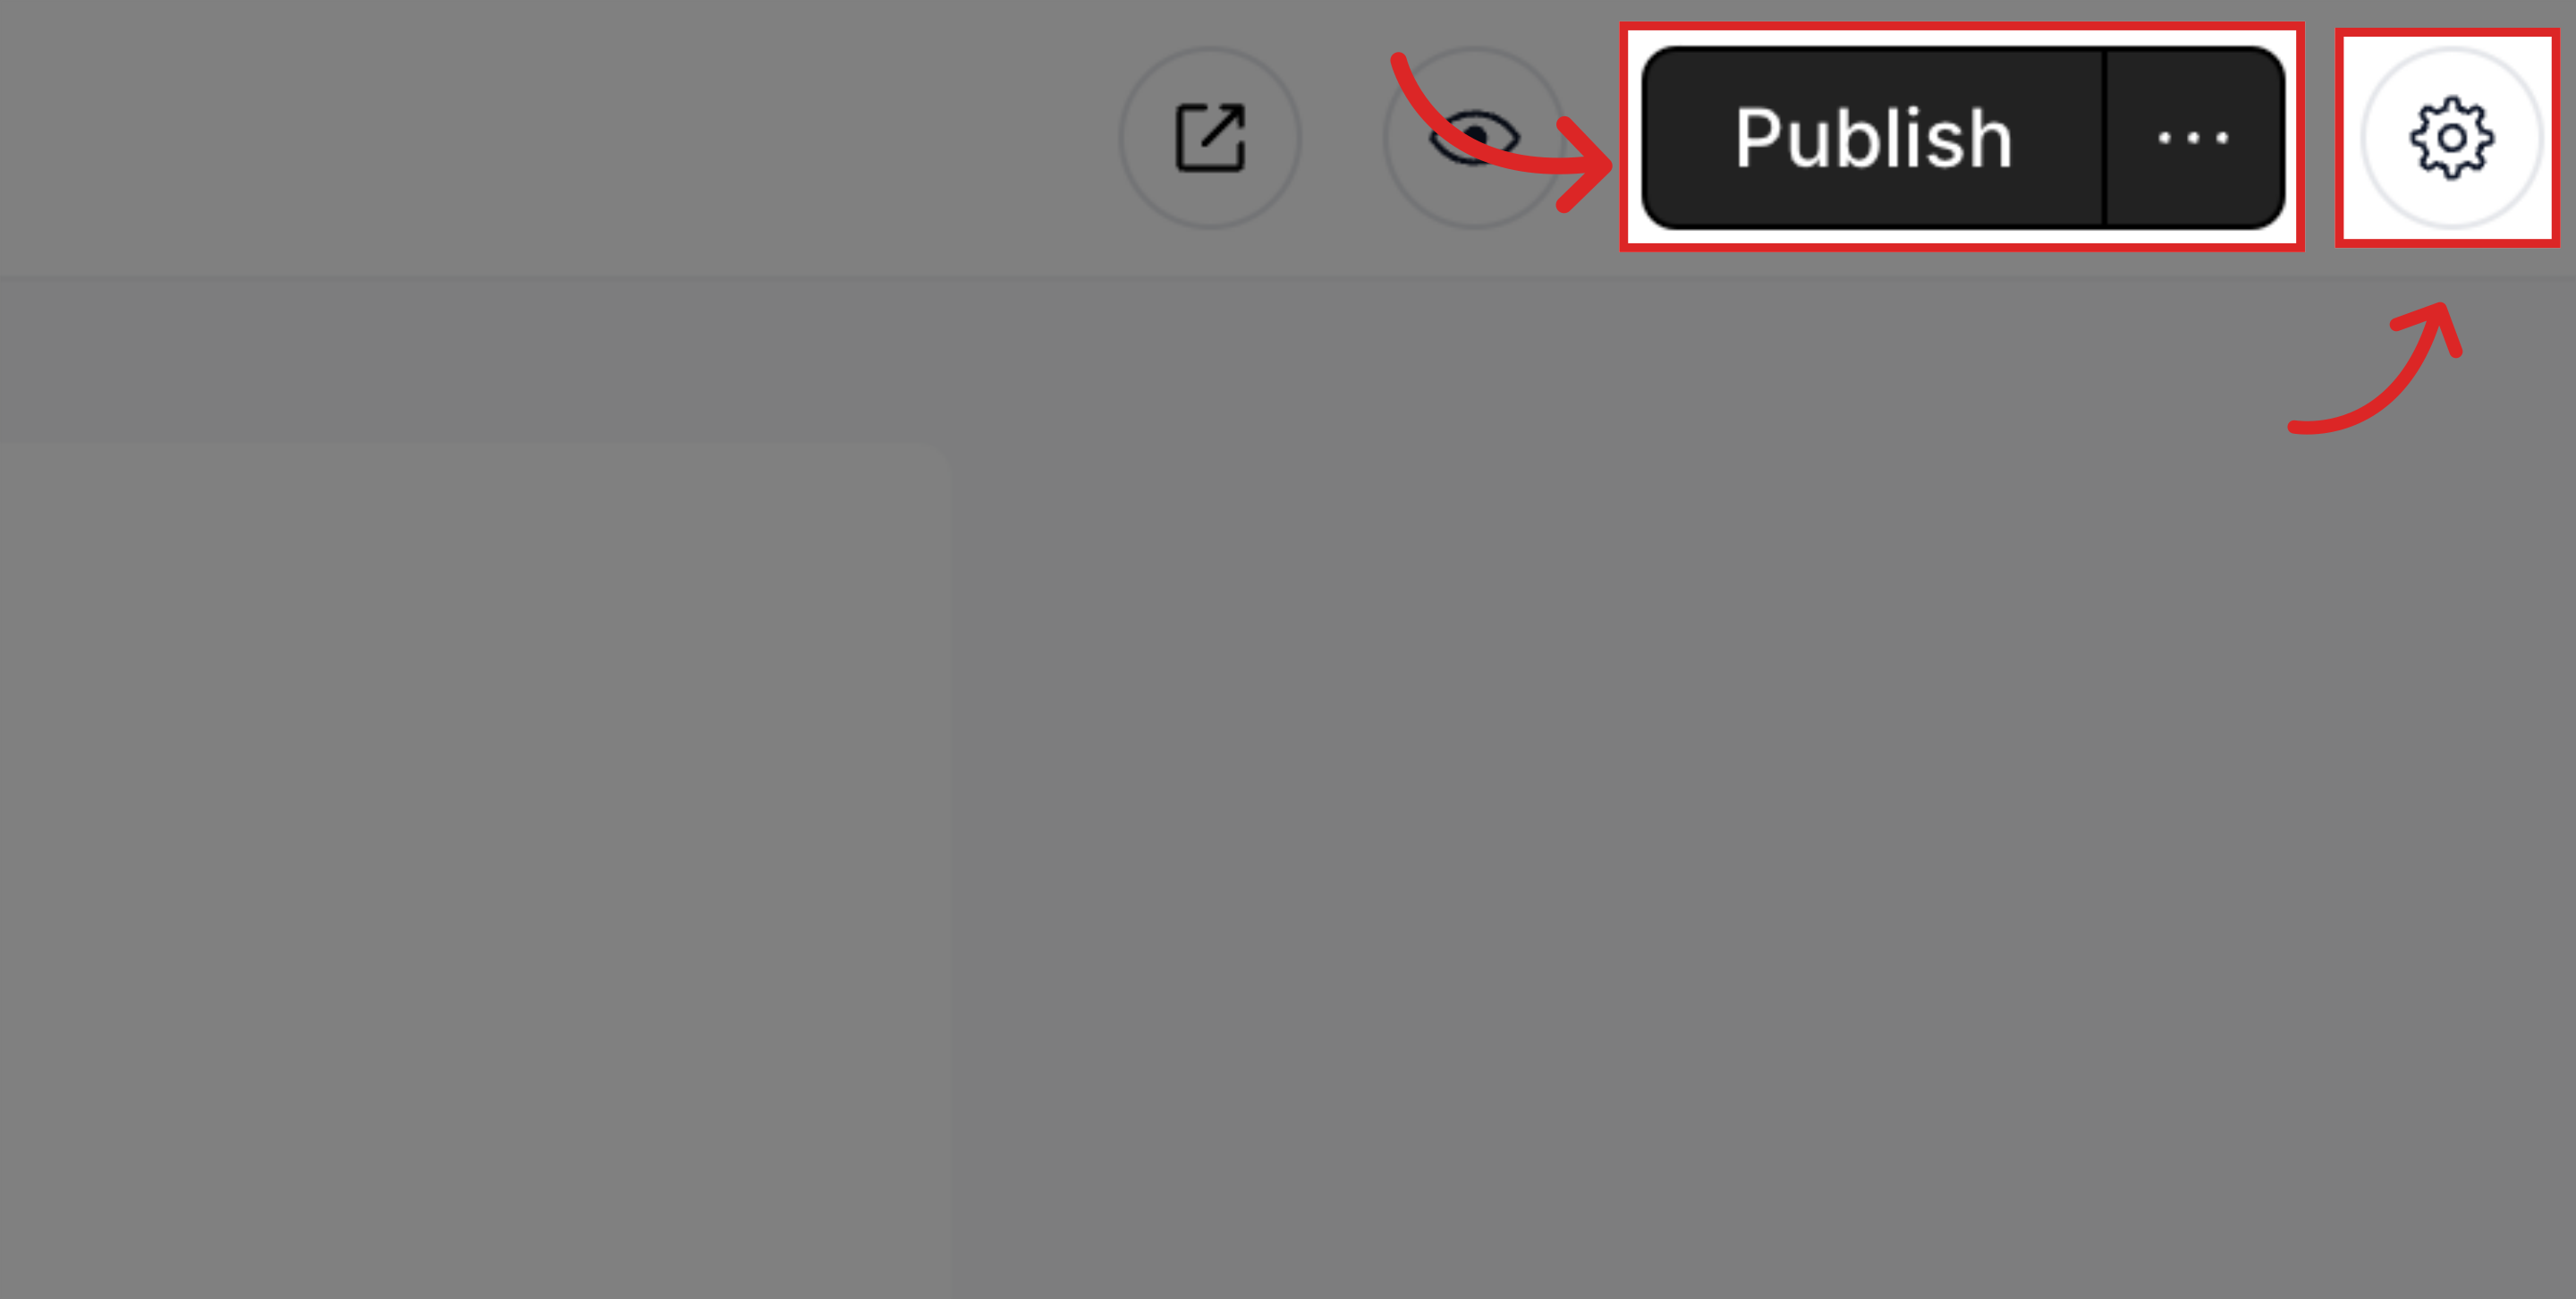
Once you are done with writing the article, click on Publish. This makes your help article public. To see more settings related the help article, you can click on the gear shaped icon. It will allow you to edit article slug, set the right category and more.

Article Settings
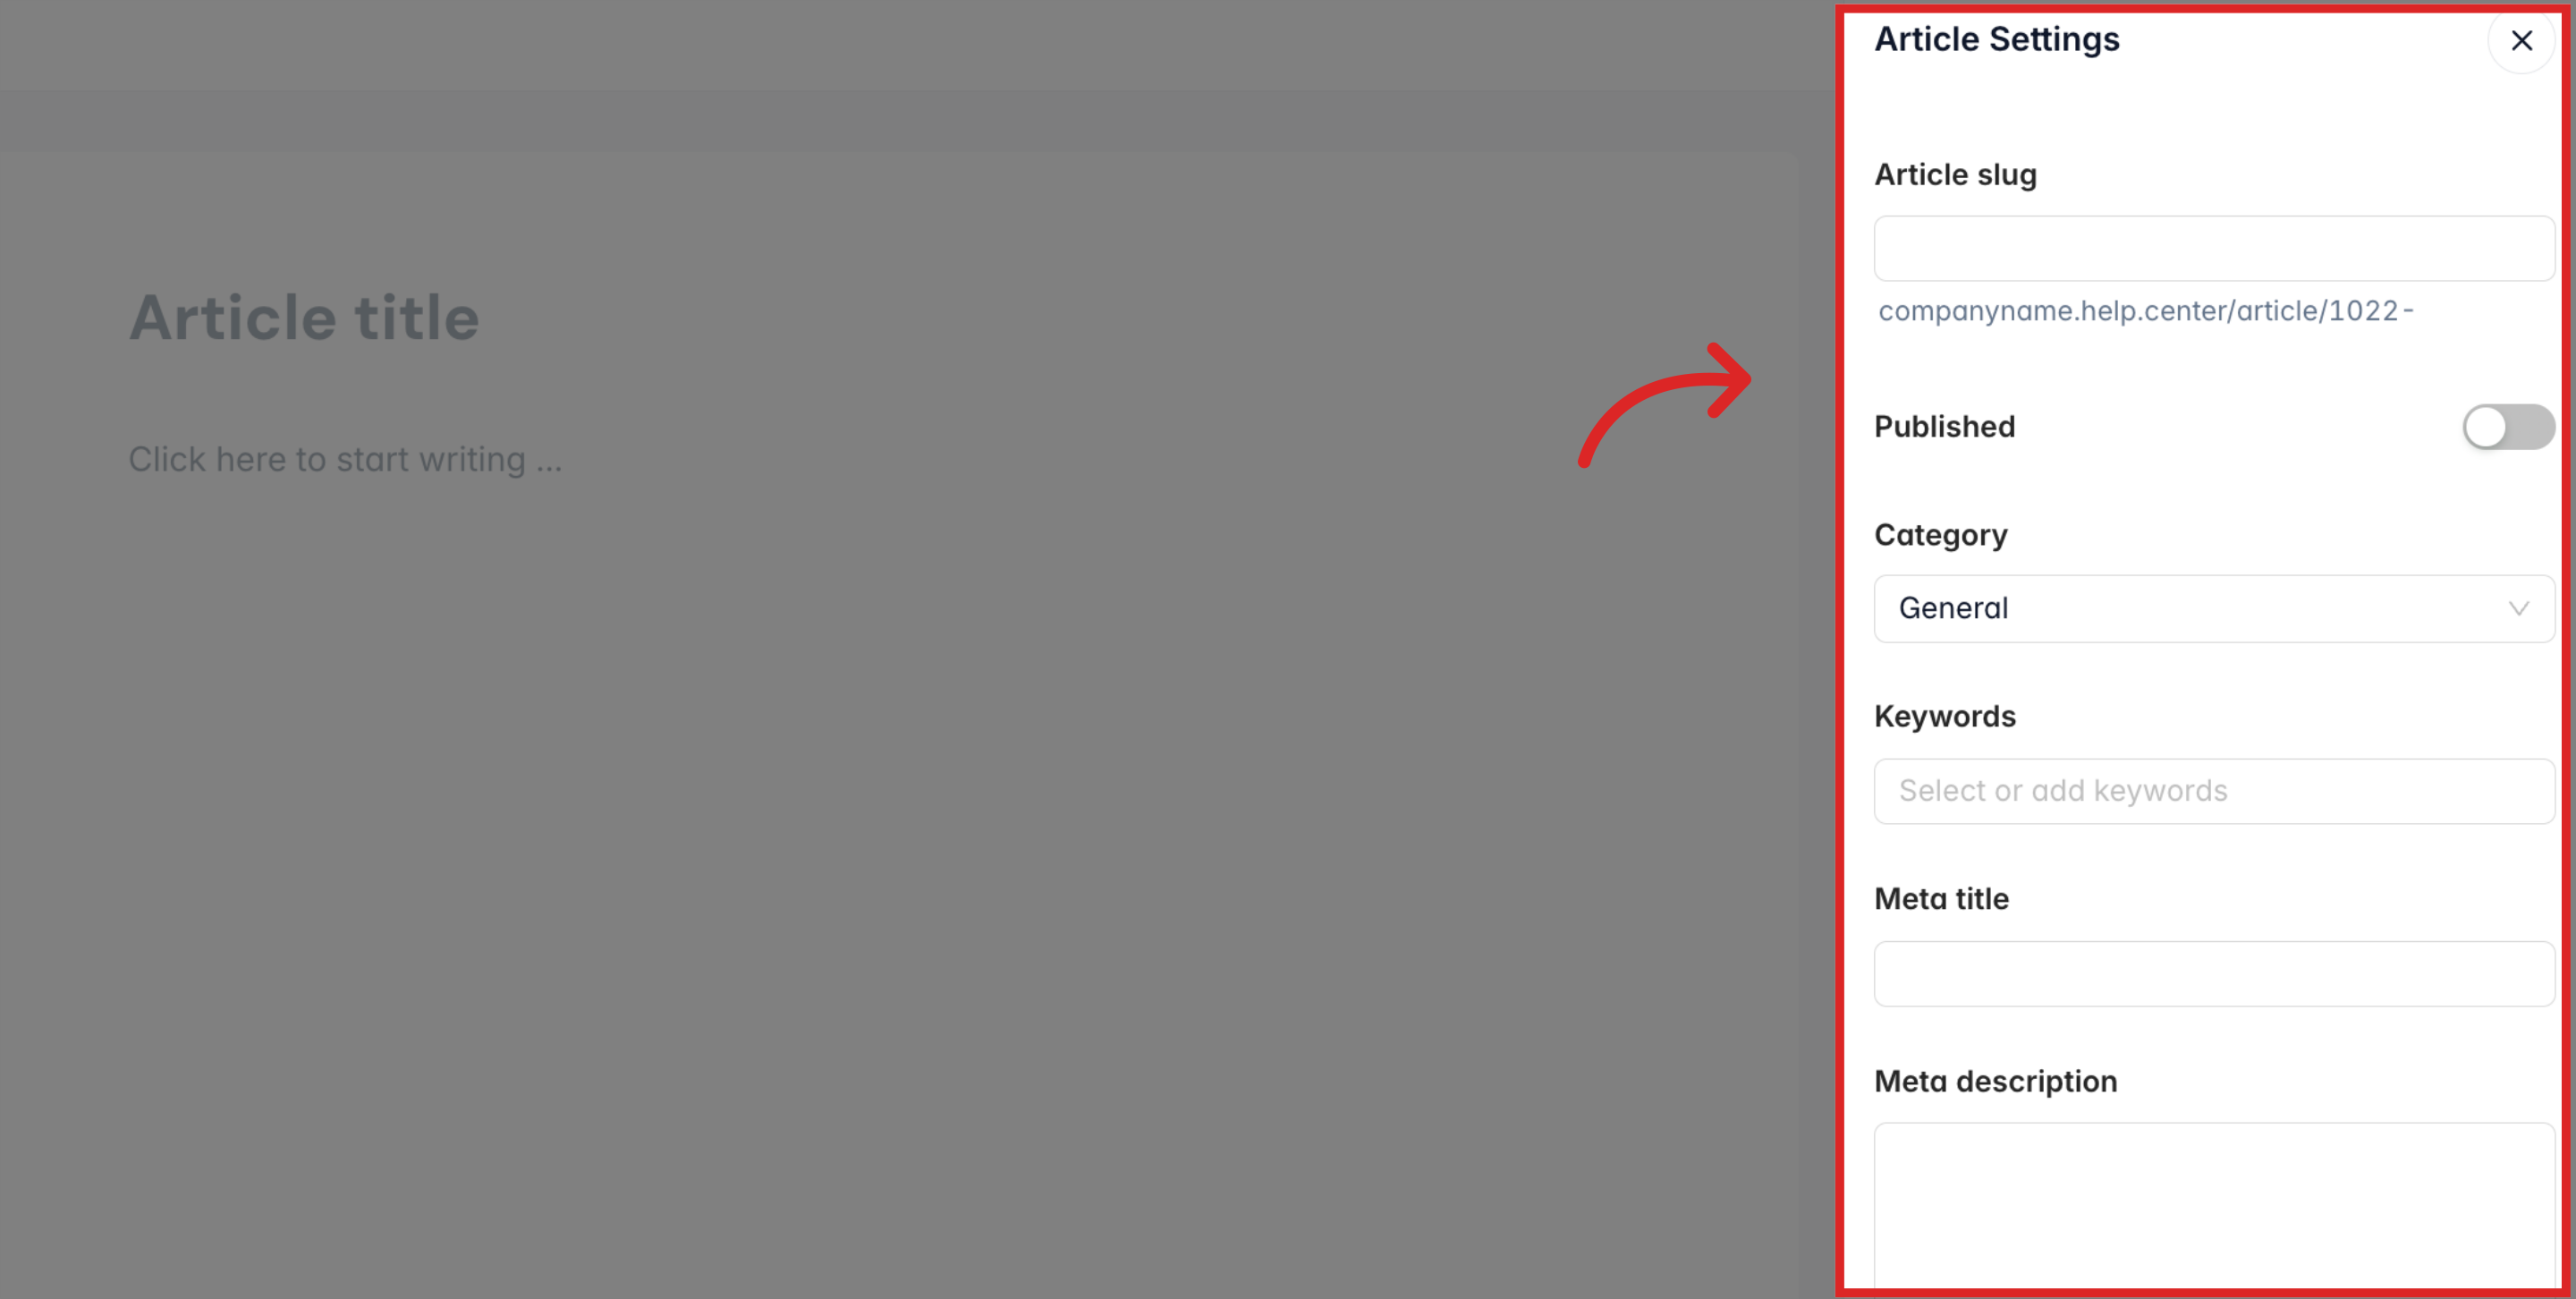
Here you will find all settings for the article including SEO.

Article slug | public URL for the article |
Category | you can choose from an existing one or create a new category as you wish. |
Keywords | you can choose from existing or create new ones as you need. |
Meta title | is the title of a web page displayed in search engine results |
Meta description | provides a brief summary of the page's content |
Tip
Meta title and Meta description are important for SEO. It is what your customers will see when you share the link in Social Media.
Still need help?
Contact us